Local Number

480-274-9662

Author: azip

10 Signs You Need Repiping ASAP: Don’t Ignore These Warning Signs

Why Recognizing Repiping Needs Is Critical

Your plumbing system is the backbone of your home or business, ensuring clean water flows and waste is removed efficiently. However, as pipes age and deteriorate, they begin to fail, causing problems that compromise the safety, comfort, and functionality of your property. From recurring leaks to water damage, ignoring the warning signs of failing pipes can lead to emergencies that disrupt your life or business operations.

At Arizona Integrity Plumbing, we’ve earned our reputation as The Repipe Expert™ and the #1 Repipe Specialist in Phoenix, AZ, by providing reliable, professional repiping services for residential and commercial properties. As a trusted service establishment, we deliver solutions that address not only your plumbing problems but also protect your property from costly repairs and downtime.

Whether you need a modern plumbing upgrade for your home or a complete system overhaul for your business, our water damage restoration services and drainage services ensure your property is safeguarded against the risks of failing pipes.

In this blog, we’ll explore the 10 warning signs that signal the need for repiping. If you recognize any of these issues, taking immediate action can save you from long-term damage, expensive repairs, and unnecessary stress.

What Is Repiping?

Repiping is a comprehensive solution that involves replacing old or failing pipes in your plumbing system with modern, durable materials like PEX piping or copper. Unlike quick fixes or patchwork repairs, repiping resolves systemic problems, ensuring reliable performance, improved water quality, and enhanced efficiency.

By investing in professional repiping services, you’re also addressing potential issues with your drainage system, preventing water damage, and future-proofing your property.

10 Signs You Need Repiping ASAP

Ignoring the warning signs of failing pipes can result in costly repairs, disrupted operations, and even structural damage. Let’s explore the top 10 indicators that your plumbing system may need a complete overhaul.

  1. Persistent Leaks

Leaks are one of the most obvious signs of pipe failure. While a single leak may seem like a minor issue, recurring leaks indicate systemic deterioration that requires immediate attention. This can lead to significant damage if ignored, especially in high-use areas.

Why Persistent Leaks Matter:

  • Leaks waste water, increase utility bills, and strain your system.
  • Undetected leaks can cause structural damage, mold growth, and require extensive water damage restoration services.

Actionable Insights:

  • Conduct regular inspections for water stains, damp walls, or musty odors.
  • Consult our professional repair service to assess if leaks are localized or part of a larger issue.
  1. Low Water Pressure

Low or inconsistent water pressure can make basic tasks frustrating and inefficient. This is often caused by mineral buildup, corrosion, or blockages in failing pipes. Commercial properties like restaurants and offices often face operational disruptions due to poor water pressure.

What Causes Low Water Pressure?

  • Corroded pipes narrowing water flow.
  • Mineral buildup in water pumps or lines.
  • Hidden leaks reducing pressure.

Actionable Insights:

  • Test water pressure at multiple fixtures.
  • Install a water softener to reduce mineral buildup if pipes are still functional.
  • If pressure issues persist, repiping is a long-term solution.
  1. Discolored or Rusty Water

If your water has a brown, yellow, or reddish tint, it’s often due to rust and sediment inside your pipes. This affects not only water quality but also the safety of your household or business.

Health and Safety Risks:

  • Contaminated water from corroded pipes can harm appliances, fixtures, and health.
  • Rust particles can clog drainage systems, requiring professional drainage services.

Actionable Insights:

  • Flush your system to check if discoloration is temporary.
  • Schedule a water test to ensure there are no harmful contaminants.
  • Replace old pipes to restore water clarity and quality.
  1. Frequent Pipe Bursts

Pipe bursts are plumbing emergencies that can cause extensive damage. They’re often the result of weakened joints or extreme pressure within aging pipes.

Why It Matters:

  • Burst pipes can flood your property, requiring immediate water damage restoration services.
  • They often signal widespread pipe failure.

Actionable Insights:

  • Install a pressure regulator to protect against surges.
  • Replace failing pipes with modern materials like PEX.
  • Consult a trusted service establishment for 24/7 emergency support.
  1. High Water Bills

Unexplained increases in your water bill often indicate hidden leaks or inefficiencies in your plumbing system. Even minor leaks can waste hundreds of gallons of water each month.

What to Watch For:

  • Water meter running when no fixtures are in use.
  • Damp or soggy areas around your property, often near buried pipes or water pumps.

Actionable Insights:

  • Use your water meter to detect leaks.
  • If leaks are persistent, repiping ensures long-term efficiency and cost savings.
  1. Noisy Pipes

Banging, whistling, or gurgling sounds in your pipes are more than just annoying—they’re indicators of water hammer, air pockets, or structural damage.

Common Causes:

  • Loose fittings or joints causing vibrations.
  • Air trapped in pipes or drainage systems.
  • Corrosion weakening pipe walls.

Actionable Insights:

  • Install water hammer arrestors to absorb shockwaves.
  • If noise persists, consult a repair service to determine if repiping is necessary.
  1. Visible Corrosion or Damage

If exposed pipes show rust, cracks, or bulges, it’s a clear sign the material is degrading. This visible damage often reflects the condition of hidden pipes within your walls or foundation.

What to Do:

  • Inspect exposed pipes regularly for damage.
  • Contact a drainage service to prevent backups caused by debris from corroding pipes.
  1. Water Temperature Inconsistencies

If your water temperature fluctuates unexpectedly, your pipes may be struggling to maintain consistent flow due to clogs, corrosion, or aging materials.

Actionable Insights:

  • Flush your water heater to remove sediment that might be clogging your water pump.
  • Repiping ensures smooth and consistent water flow to all fixtures.
  1. Outdated Pipe Materials

Older homes and businesses often have plumbing systems made of materials like galvanized steel or polybutylene, which are prone to failure. These outdated materials are not up to modern safety and efficiency standards.

Upgrade Options:

  • Replace old pipes with PEX for flexibility and durability.
  • Opt for copper pipes for commercial properties requiring high durability.
  1. Renovations or Expansions

If you’re upgrading or expanding your property, ensure your plumbing system can handle increased demand. Repiping prevents future issues from undermining your investment.

Actionable Insights:

  • Include repiping in renovation budgets to avoid future disruptions.
  • Work with a professional service establishment like Arizona Integrity Plumbing for seamless integration of new systems.

Why Repiping Is the Right Solution

Repiping isn’t just a repair—it’s an investment in safety, efficiency, and value. By addressing failing pipes, you prevent water damage, improve efficiency, and future-proof your property’s plumbing system.

Why Choose Arizona Integrity Plumbing?

As The Repipe Expert™ in Phoenix, we offer:

  • Comprehensive Services: From repiping to emergency water damage restoration services, we handle it all.
  • Durable Materials: We use PEX and copper for reliable, long-lasting performance.
  • Expert Team: Decades of experience in repair services for residential and commercial clients.

Take Action Today

Call Us Now: Don’t let plumbing issues worsen—contact Arizona Integrity Plumbing for a consultation.

Secure your property with trusted services from The Repipe Expert™ in Phoenix, AZ!

The Ultimate Guide to Replumbing Services in Phoenix, AZ: Comprehensive Plumbing Solutions for Your Home

Why Replumbing Is Critical for a Healthy and Reliable Home

Your plumbing system is the backbone of your home or business. It ensures clean water is delivered to your faucets, waste is removed efficiently, and daily routines run smoothly. However, even the best plumbing systems wear out over time. Frequent leaks, rusty water, low pressure, and unusual sounds often signal the need for more than a quick repair—they point to the need for comprehensive replumbing.

At Arizona Integrity Plumbing, we are proud to be Phoenix’s premier service establishment specializing in professional replumbing services for residential and commercial properties. Our expertise goes beyond replacing pipes. Replumbing involves upgrading your entire plumbing infrastructure, optimizing layouts, and ensuring every component meets modern efficiency and safety standards.

We also provide related services, such as water damage restoration service, drainage service, and high-quality installations with materials sourced from leading plumbing supply stores. Whether you’re addressing chronic issues or planning renovations, investing in our expert replumbing services is the key to creating a safe and efficient plumbing system.

What Is Replumbing?

Replumbing is a complete overhaul of your plumbing system. While repiping focuses solely on replacing pipes, replumbing goes further to modernize and enhance your entire system. It ensures that everything—from fixtures to connections—is optimized for long-term safety, functionality, and efficiency.

Key Components of Replumbing:

  1. Upgrading Fixtures: Replacing faucets, showerheads, and toilets with modern, water-saving designs.
  2. Installing Modern Materials: Durable, corrosion-resistant options like PEX piping or copper.
  3. Reconfiguring Layouts: Improving water flow and system efficiency for better functionality.
  4. Replacing Valves and Shutoffs: Ensuring critical components are reliable and up to code.
  5. Drainage Optimization: Addressing flow issues with expert drainage services for seamless waste removal.

Why Replumbing Is Essential

Replumbing offers more than a simple fix—it provides a complete solution to aging or failing systems, ensuring your home or business operates efficiently and safely. Here’s why it’s critical:

1. Eliminate Aging Infrastructure

Older homes and buildings often have plumbing made from materials like galvanized steel or polybutylene, both prone to corrosion and sudden failure. Replumbing replaces these outdated materials with long-lasting alternatives.

2. Improve Water Quality

Old pipes can contaminate your water with rust, sediment, and harmful chemicals. Replumbing eliminates these risks, ensuring clean, healthy water for drinking, cooking, and bathing.

3. Prevent Costly Repairs

Frequent leaks and failing pipes often lead to expensive repairs or emergency water damage restoration services. Replumbing proactively addresses these vulnerabilities, saving you money and hassle.

4. Enhance Efficiency

Modern systems conserve water and energy, lowering utility bills. Replumbing also ensures your system can handle water-efficient fixtures, such as dual-flush toilets and low-flow showerheads.

5. Increase Property Value

Replumbing is a significant upgrade that makes homes and commercial properties more attractive to buyers.

Signs Your Home or Business Needs Replumbing

Replumbing isn’t always an obvious need. However, recognizing these common signs can help you avoid costly damage or disruptions:

1. Persistent Leaks

If leaks occur frequently in multiple areas, it’s a sign your pipes are deteriorating. Temporary fixes won’t solve systemic issues.

Pro Tip:

Schedule an inspection with Arizona Integrity Plumbing, your trusted repair service, to identify and address the root cause of leaks.

  1. Discolored or Foul-Smelling Water

Rusty or yellow water signals corrosion inside your pipes. An unpleasant odor or metallic taste may also indicate contamination.

How We Help:

We replace failing pipes and ensure clean water flow with high-quality materials.

  1. Low or Inconsistent Water Pressure

Weak water pressure disrupts your daily routines. It’s often caused by mineral buildup, blockages, or worn-out pipes.

Pro Tip:

Install a water pump to boost pressure and consider replumbing to eliminate underlying issues.

  1. Noisy Pipes

Banging, whistling, or gurgling sounds often indicate structural problems, air pockets, or high water pressure in deteriorating pipes.

Solution:

Our experts secure loose connections and replace failing pipes to eliminate noise and prevent future issues.

  1. Outdated Fixtures

Old, inefficient fixtures not only waste water but also may no longer meet modern plumbing standards.

Upgrade Opportunity:

Replumbing is the perfect time to install water-efficient fixtures, such as low-flow faucets and dual-flush toilets.

The Replumbing Process: What to Expect

Replumbing is a detailed process that restores your plumbing system’s integrity. Here’s how Arizona Integrity Plumbing ensures the highest quality service:

1. Initial Assessment and Planning

We inspect your entire system, identifying problem areas such as leaks, outdated components, or drainage issues.

Tailored Solutions:

We work with you to create a customized replumbing plan, incorporating necessary upgrades and layout improvements.

  1. Removal of Outdated Components

Old pipes, valves, and fixtures are carefully removed with minimal disruption to your home or business.

  1. Installation of Modern Materials

We use durable materials like PEX piping or copper, ensuring long-lasting performance and reliability.

  1. Layout Optimization

We optimize your system’s layout for better water flow and drainage, addressing common issues with our expert drainage service.

  1. Testing and Quality Assurance

Our team thoroughly tests your new system for leaks, water pressure, and functionality, ensuring everything operates perfectly.

  1. Restoration and Cleanup

We restore affected areas to their original condition, leaving your property clean and fully functional.

Benefits of Replumbing with Arizona Integrity Plumbing

Choosing Arizona Integrity Plumbing for your replumbing needs offers unmatched advantages:

1. Improved Functionality

Enjoy consistent water pressure, seamless drainage, and reliable operation.

  1. Enhanced Safety

Our modern materials eliminate risks associated with rust, lead, and contamination.

  1. Long-Term Durability

With minimal maintenance, your new system will perform efficiently for decades.

  1. Eco-Friendly Upgrades

Replumbing allows for the installation of water- and energy-saving systems, such as water pumps for improved efficiency.

  1. Comprehensive Customization

Our expertise ensures every detail is tailored to your needs, from fixtures to drainage optimization.

Tips for Maintaining Your Plumbing System After Replumbing

Proper maintenance extends the life of your new system:

  1. Annual Inspections: Regular check-ups prevent minor issues from becoming major problems.
  2. Use Water Softeners: Phoenix’s hard water can cause scaling; a water softener protects pipes and fixtures.
  3. Flush Your Water Heater: Avoid sediment buildup by flushing your heater annually.
  4. Monitor Water Pressure: Install regulators to maintain optimal pressure.
  5. Avoid Harsh Chemicals: Opt for natural drain cleaners to protect your pipes.

Why Choose Arizona Integrity Plumbing for Your Replumbing Needs?

We are more than a plumbing company—we are Phoenix’s trusted service establishment offering comprehensive solutions:

  • Experienced Professionals: Years of expertise in replumbing, repair services, and drainage optimization.
  • High-Quality Materials: Sourced from top-tier plumbing supply stores for long-lasting reliability.
  • Customer-Focused: We minimize disruption and deliver transparent pricing.

Take the First Step Toward a Reliable Plumbing System

Don’t wait for plumbing issues to escalate. Whether you need a complete overhaul, water damage restoration services, or drainage optimization, Arizona Integrity Plumbing is here to help.

Call Today: Schedule your free consultation.

Future-proof your plumbing system with the best. Trust Arizona Integrity Plumbing—your ultimate partner for residential and commercial replumbing services in Phoenix, AZ.

Expert Repiping Services in Phoenix, AZ: PEX, Polybutylene Replacement, Galvanized Pipe Upgrades, and More

The Comprehensive Guide to Repiping Services in Phoenix, AZ

Plumbing issues are among the most frustrating challenges homeowners and business owners face. From persistent leaks and rusty water to weak water pressure, outdated or damaged pipes can disrupt your property’s comfort, safety, and efficiency. When your plumbing system becomes more of a burden than a solution, it’s time to consider professional repiping services from a trusted service establishment.

At Arizona Integrity Plumbing, we’re proud to be recognized as The #1 Repipe Specialist in Phoenix, AZ, and the trusted Repipe Expert™. With our unmatched expertise and commitment to quality, we’ve earned a reputation as the go-to provider for comprehensive repiping solutions. Whether you’re dealing with outdated polybutylene or galvanized pipes or looking to upgrade to modern, durable PEX piping, our team is equipped to deliver exceptional results that last.

What You’ll Learn in This Guide

This guide is designed to help you understand everything you need to know about repiping and how it can benefit your property. You’ll discover:

  • The clear signs that your property may need repiping.
  • The step-by-step process we use to deliver top-tier repiping services.
  • The long-term benefits of upgrading to modern, efficient plumbing materials.
  • Why Arizona Integrity Plumbing is Phoenix’s top choice for both residential and commercial repiping services.

By the end, you’ll have the confidence to make informed decisions about your plumbing system and understand how our industry-leading repiping solutions can transform your home or business. Let’s dive in!

PEX Repiping in Phoenix: A Modern Solution

What Is PEX Repiping and Why Is It Important?

PEX, or cross-linked polyethylene piping, is a revolutionary material that has transformed the plumbing industry. Unlike traditional copper or galvanized pipes, PEX is flexible, resistant to corrosion, and highly durable, making it an ideal choice for repiping projects in Phoenix, AZ. As a leading service establishment, we specialize in PEX repiping, offering solutions that are tailored to withstand the region’s unique water conditions and climate challenges.

Signs You Need PEX Repiping

  • Persistent Leaks: Frequent leaks suggest failing pipes.
  • Discolored Water: Brown or reddish water is often caused by corroded pipes.
  • Low Water Pressure: Mineral buildup and corrosion restrict water flow, leading to pressure issues.
  • Frequent Repairs: If you’re regularly calling for repair services, repiping with PEX is a cost-effective, long-term solution.

Our PEX Repiping Process

  1. Assessment: We thoroughly inspect your plumbing system to identify problem areas.
  2. Preparation: We map out an efficient PEX piping layout to optimize performance.
  3. Installation: Using cutting-edge techniques, we replace old pipes with high-quality PEX.
  4. Testing: We test the system to ensure seamless operation and address any issues.
  5. Cleanup: We restore affected areas, leaving your property clean and functional.

Why Choose PEX?

  • Resistant to hard water buildup, a common issue in Phoenix.
  • Flexible and requires fewer joints, minimizing potential leaks.
  • Cost-effective and long-lasting, reducing the need for future repairs.

Polybutylene Repiping: Eliminating Hidden Risks

Why Replace Polybutylene Pipes?

Polybutylene pipes were widely used from the 1970s to the 1990s but are now notorious for their tendency to fail without warning. These pipes degrade over time, leading to leaks, bursts, and water damage. Insurance companies often refuse coverage for homes with polybutylene pipes, making replacement essential for peace of mind.

Signs You Have Polybutylene Pipes

  • Gray or Blue Pipes: Polybutylene pipes are often found in older homes.
  • Frequent Leaks or Bursts: These pipes fail unexpectedly, even without visible damage.
  • High Water Bills: Hidden leaks in polybutylene pipes can cause water usage to spike.
  • Construction Era: Homes built between 1978 and 1995 are likely to have polybutylene pipes.

Our Polybutylene Replacement Process

  1. Inspection: Confirm the presence of polybutylene pipes.
  2. Removal: Safely remove outdated pipes while minimizing disruption.
  3. Installation: Replace with modern materials like PEX or copper for reliable performance.
  4. Testing: Ensure the system is leak-free and functions properly.
  5. Cleanup: Restore affected areas, ensuring your property is clean and undisturbed.

Galvanized Pipe Replacement: Upgrading Outdated Systems

What Are Galvanized Pipes?

Galvanized pipes, made of steel coated with zinc, were common in homes built before the 1960s. Over time, the zinc coating corrodes, leading to rust, mineral buildup, and decreased functionality. These pipes are also prone to bursts, necessitating replacement with modern materials.

Signs You Need Galvanized Pipe Replacement

  • Rusty Water: Indicates internal corrosion.
  • Low Water Pressure: Caused by mineral deposits and rust buildup.
  • Frequent Leaks: Corrosion weakens the pipe walls, leading to frequent failures.

Our Process

  • Inspection: Assess the extent of corrosion.
  • Planning: Design a replacement system using durable PEX or copper.
  • Installation: Replace corroded pipes while minimizing impact on your home.
  • Testing: Ensure the new system meets all safety and efficiency standards.
  • Restoration: Restore walls and surfaces affected during the process.

General Repiping Services: A Fresh Start for Your Plumbing System

Why Choose General Repiping?

  • Resolves multiple plumbing issues, from leaks to clogs, in one comprehensive service.
  • Improves water quality by eliminating rust, sediment, and contaminants.
  • Supports modern appliances and fixtures for greater efficiency.

Our Repiping Process

  1. Evaluation: Conduct a full assessment of your plumbing system.
  2. Planning: Create a custom plan tailored to your property’s needs.
  3. Installation: Replace your plumbing with high-quality materials for long-term reliability.
  4. Testing and Cleanup: Verify the system’s performance and restore your property.

Why Repiping Is an Investment in Your Property

Repiping isn’t just about fixing immediate problems—it’s about ensuring the long-term safety, efficiency, and value of your property. Modern materials like PEX and copper are designed to withstand Phoenix’s hard water and fluctuating temperatures, reducing the risk of future leaks, bursts, and costly water damage restoration services.

Why Choose Arizona Integrity Plumbing?

As the trusted Repipe Expert™ in Phoenix, we deliver:

  • Expertise: Decades of experience in repiping homes and businesses.
  • High-Quality Materials: PEX and copper pipes for superior durability.
  • Comprehensive Services: From repiping to drainage services and water pump installations.
  • Customer Satisfaction: Transparent pricing, minimal disruption, and guaranteed results.

Take the First Step Toward Reliable Plumbing

Contact Arizona Integrity Plumbing Today: Schedule your consultation for repiping or other repair services.

Let The Repipe Expert™ transform your plumbing!

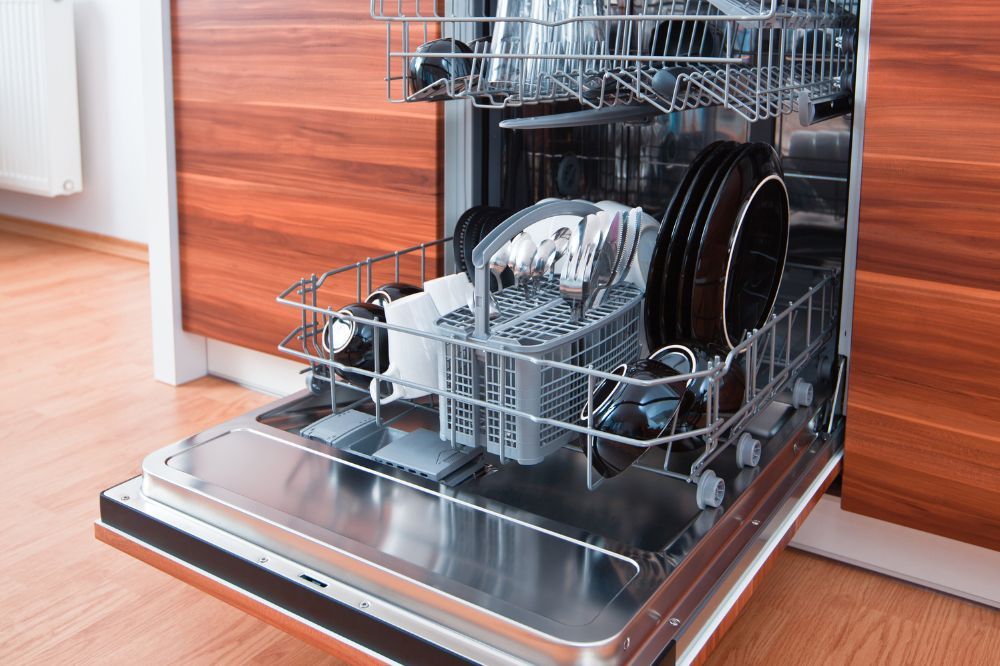
Do You Need a Plumber to Install a Dishwasher?

Do You Need a Plumber to Install a Dishwasher?

Yes, you may need a plumber to install a dishwasher, especially if your kitchen’s plumbing setup requires new connections or modifications. A dishwasher is a great addition to any kitchen, but proper installation ensures it operates efficiently without leaks or other issues. 

While some installations are straightforward, others demand the expertise of a professional like a plumber, particularly if changes to water lines or drains are necessary.


Choosing the Right Dishwasher for Your Needs

Selecting the right dishwasher is the first step toward a seamless installation. Here’s what to consider:

  • Measure your space: Ensure the dishwasher fits snugly in the designated area.
  • Check plumbing compatibility: Confirm your kitchen’s water lines, drains, and power outlets align with your chosen model.
  • Water efficiency: Modern dishwashers often come with energy and water-saving features. Choose one that aligns with your sustainability goals.
  • Seek expert advice: Unsure which model is best? AZIP offers guidance to help you select a dishwasher compatible with your existing setup.

By starting with the right appliance, you minimize potential installation headaches and ensure long-term satisfaction with your investment.


Checking Your Kitchen’s Plumbing Setup

Before installing a dishwasher, assess your kitchen’s plumbing readiness:

  1. Hot water line availability: Dishwashers require a steady hot water supply, ideally near your sink.
  2. Functional waste pipe: This ensures proper drainage for your appliance.
  3. Power outlet placement: A nearby, grounded outlet is essential.
  4. Pipe conditions: Old or corroded pipes may need replacement to avoid leaks.

If your setup falls short, don’t worry. AZIP specializes in identifying and resolving such issues, ensuring your kitchen is ready for a smooth installation. A well-prepared setup eliminates unnecessary stress during the installation process.


Preparing Your Kitchen for Installation

Preparation is vital for a hassle-free dishwasher installation. Follow these steps:

  • Clear the space: Remove items from the cabinet under your sink and around the installation area.
  • Inspect shut-off valves: Ensure your water shut-off valves are functional and leak-free.
  • Check for obstructions: Make sure nothing blocks plumbing or electrical access points.
  • Schedule a pre-installation check: If you’re uncertain about your kitchen’s readiness, AZIP can conduct an assessment to address potential concerns upfront.

Proper preparation saves time, reduces the chances of unexpected delays or costs, and ensures everything is set for a flawless setup.


DIY Installation vs. Hiring a Professional

Should you install a dishwasher yourself or call a professional? It depends on the complexity:

DIY Installation

  • Suitable for simple setups: If all connections are in place and you’re confident with tools, DIY can save money.
  • Risks: Errors like loose connections or improper leveling may lead to leaks or inefficient operation.

Professional Installation

  • Best for complex jobs: If plumbing or electrical adjustments are required, hire a plumber or electrician.
  • Benefits: Professionals like AZIP ensure compliance with safety standards and local codes, giving you peace of mind.

Professional help guarantees your dishwasher is installed securely and functions perfectly.


Understanding Local Building Codes

Local building codes often govern how dishwashers are installed, and non-compliance can result in fines or safety risks. Here’s what to know:

  1. Permit requirements: Some jurisdictions mandate permits for new installations.
  2. Licensed professionals: Codes may require licensed plumbers or electricians for certain tasks.
  3. Inspection readiness: A professional installation ensures your setup passes any required inspections.

AZIP’s team is familiar with local regulations and can handle these details, ensuring your installation meets all legal requirements. Taking this step prevents costly mistakes and ensures a legal installation.


Handling Plumbing Challenges During Installation

Dishwasher installations can uncover unexpected plumbing challenges:

  • Mismatched pipe sizes: Older homes often have non-standard fittings.
  • Low water pressure: This can impact the dishwasher’s performance.
  • Hard-to-reach connections: Professional tools and expertise make these accessible.

Professional intervention ensures these common plumbing obstacles don’t derail your installation plans.

AZIP plumbers are skilled at resolving such issues quickly, preventing delays, and ensuring a reliable setup.


Connecting the Water Supply and Drain

Proper water and drain connections are critical for dishwasher functionality:

  • Water inlet connection: Must be secure to prevent leaks.
  • Drain line setup: Incorrect drainage can cause backflow or improper operation.
  • Safety compliance: Professional plumbers ensure connections meet local safety standards.

For guaranteed precision, trust AZIP to handle these technical aspects efficiently. Their expertise in secure connections prevents future problems and ensures long-term satisfaction.


Addressing Common Installation Mistakes

Mistakes during installation can lead to long-term problems:

  • Improper leveling: Causes water to pool inside the dishwasher.
  • Loose fittings: Lead to leaks over time.
  • Ignoring manufacturer guidelines: May void warranties.

Avoid these pitfalls by hiring AZIP for professional dishwasher installation, ensuring your appliance functions optimally from day one. They use best practices to safeguard against installation errors and maximize performance.


When Electrical Work is Required

Many dishwashers require specialized electrical work:

  • Dedicated outlets: Some models need a unique circuit to prevent overloads.
  • Hardwiring: Often necessary for permanent installations.
  • Safety concerns: Electrical work requires adherence to strict codes to prevent hazards.

For seamless coordination, AZIP can work alongside certified electricians to address any electrical requirements. This ensures both plumbing and electrical systems integrate seamlessly for a reliable setup.


Maintaining Your Dishwasher After Installation

Once your dishwasher is installed, maintenance is key to longevity:

  • Clean filters regularly: This prevents clogs and ensures efficiency.
  • Inspect hoses: Look for wear and replace if needed.
  • Use recommended detergents: Follow manufacturer instructions for best results.

For ongoing support, AZIP offers maintenance tips and services to keep your dishwasher in excellent condition. Regular upkeep ensures your dishwasher remains efficient and trouble-free for years to come.


Final Thoughts

Installing a dishwasher can be straightforward or complex, depending on your kitchen’s setup. While some tasks can be DIY, others demand professional expertise to ensure safety, compliance, and reliability. 

AZIP offers comprehensive dishwasher installation services, addressing everything from plumbing to electrical needs.

Ready to get started? Contact AZIP today for expert assistance tailored to your home’s needs.


FAQs

Do I need a plumber to install my dishwasher?

Yes, especially if new plumbing connections are needed. AZIP offers professional dishwasher installation services to ensure everything is set up correctly. Learn more here.

Can I install a dishwasher without modifying my plumbing?

If your kitchen is already equipped with compatible water and drain lines, DIY installation may be possible. Unsure? Visit AZIP for a consultation.

What should I do if my dishwasher leaks after installation?

Leaks can result from loose connections or improper setup. AZIP provides troubleshooting and repair services to fix these issues. Contact us for our professional services.

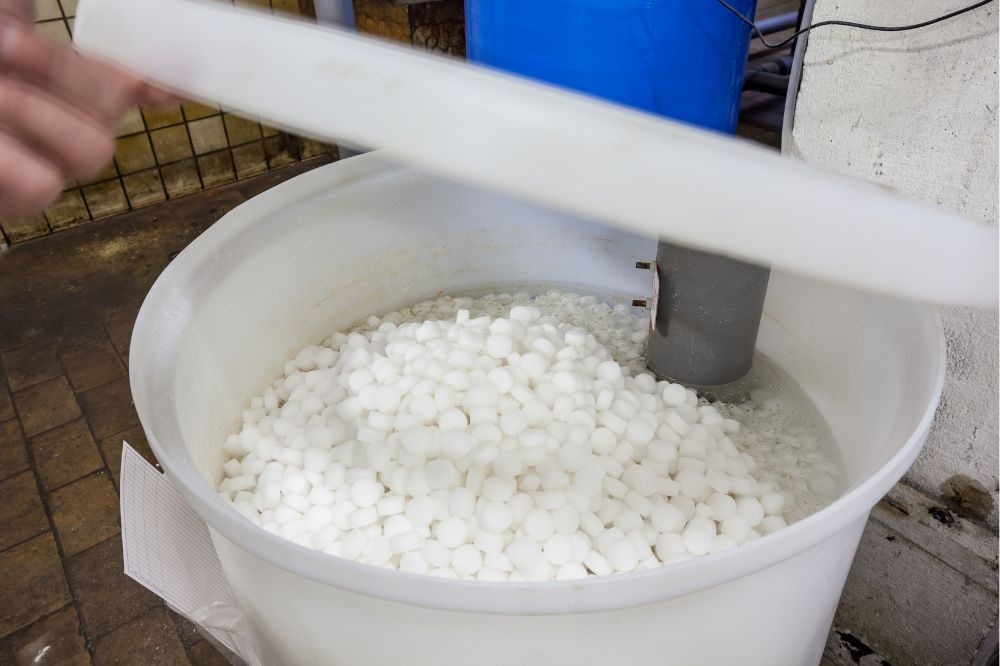
Can You Put Too Much Salt in Your Water Softener?

Can You Put Too Much Salt in Your Water Softener?

Yes, you can put too much salt in your water softener, and it can cause problems. Overfilling the brine tank can lead to inefficiencies, salt buildup, and even system damage. 

Let’s explore how water softeners use salt, why proper levels are essential, and how to avoid common issues.


How Water Softeners Use Salt

Water softeners rely on salt to regenerate the resin beads inside the system. These beads trap hard minerals like calcium and magnesium, replacing them with sodium ions. 

While salt is crucial, adding too much won’t enhance the system’s performance.

  • Excess salt doesn’t speed up regeneration. Instead, it can clog your brine tank.
  • It leads to waste, as the system can only process a set amount of salt per cycle.
  • Over time, undissolved salt can form clumps or cause blockages.

By maintaining the correct salt level, you ensure your water softener runs efficiently. 


Signs You May Be Using Too Much Salt

How can you tell if you’ve gone overboard with salt? Here are some clear signs:

  1. Salt bridges: A hardened crust forms at the top of the salt, preventing it from dissolving.
  2. Salt mush: Excess salt settles at the bottom, creating a sludge-like substance.
  3. Inefficiency: Your system may fail to soften water despite adequate salt levels.

Regularly inspecting your brine tank can help catch these issues early. 

If you notice persistent problems, it may be time to consult a professional like AZIP for expert assistance.


The Role of Proper Salt Levels in Efficiency

Maintaining the right amount of salt is key to extending the lifespan and efficiency of your water softener.

  • Optimal resin regeneration: Too much or too little salt can disrupt the ion exchange process.
  • Avoiding overloading: Overfilled brine tanks strain the system and may reduce its durability.
  • Consistent soft water: Balanced salt levels ensure your water remains free of hard minerals.

To achieve this, follow your system’s specific guidelines or reach out to AZIP for personalized advice.


What Happens if Too Much Salt Is Added?

Adding excess salt might seem harmless, but it often causes more harm than good:

  1. Clumping and solidification: Overfilled tanks can lead to hardened salt masses, which block the brine system.
  2. Operational challenges: A clogged system struggles to regenerate, leaving hard water untreated.
  3. Salt waste: You’ll end up spending more money on salt that doesn’t improve performance.

To prevent these issues, always measure the salt levels and keep the tank only half-full. If unsure, consider scheduling an inspection with AZIP.


How to Determine the Correct Salt Amount

Getting the salt balance right isn’t complicated if you follow these steps:

  • Check the tank regularly. The ideal salt level is about half-full, allowing room for proper dissolution.
  • Follow manufacturer guidelines. These will specify the salt type and amount for your model.
  • Monitor usage patterns. Adjust salt levels based on household water consumption.

Consistency is key! Need help optimizing your setup? AZIP can help fine-tune your system for peak performance.


Understanding Salt Bridges and How to Prevent Them

Salt bridges can be frustrating, but with preventive care, you can avoid them entirely:

  1. Use high-quality salt. Pellets or solar salt dissolve better and reduce the risk of bridges.
  2. Don’t overfill the tank. Leave space to allow for proper salt movement.
  3. Break up deposits. Periodically check for hardened layers and stir them gently.

If salt bridges persist despite your efforts, AZIP can provide cleaning services to restore your system.


Is It Ever Okay to Overfill the Salt Tank?

While it’s generally not recommended, there are rare exceptions when overfilling might make sense:

  • Preparing for extended absences. Adding slightly more salt ensures the system runs while you’re away.
  • High water usage periods. Temporarily adding more salt can help meet increased demand.

Even in these cases, moderation is vital to avoid clogs. For tailored advice, reach out to AZIP’s team of professionals.


Maintenance Tips for Avoiding Salt Issues

Regular maintenance is the best way to prevent salt-related problems:

  • Clean the brine tank. Empty and rinse it every 6–12 months to remove debris.
  • Stick to appropriate salt types. Using the wrong kind can lead to residue buildup.
  • Monitor water usage. Adjust salt levels based on seasonal or household changes.

By staying proactive, you can keep your water softener functioning at its best. Visit AZIP’s website for more maintenance tips.


Common Mistakes When Adding Salt to Your Softener

Avoid these common pitfalls to keep your water softener running smoothly:

  1. Overfilling the tank. Leads to clogs and wasted salt.
  2. Using the wrong salt. Rock salt, for example, often leaves more residue than softer alternatives.
  3. Neglecting regular checks. Salt levels should be monitored monthly to prevent imbalances.

Have questions? The experts at AZIP are here to help.


When to Consult a Professional for Salt Issues

Sometimes, DIY efforts aren’t enough. Contact a professional if you notice:

  • Persistent clogs or salt bridges.
  • Inefficient softening despite proper maintenance.
  • Suspected system damage from misuse.

Professionals offer comprehensive repair and maintenance services to address any water softener challenges.


Final Thoughts

Adding too much salt to your water softener can cause inefficiencies, clogs, and unnecessary expenses. By maintaining proper salt levels and performing regular maintenance, you ensure your system functions effectively for years to come.

If you’re struggling with salt issues or want expert advice, AZIP is your go-to partner for all water softener needs. Don’t wait—optimize your system today!


FAQ

What happens if I don’t use enough salt in my water softener?

Without enough salt, the resin beads won’t regenerate properly, leading to hard water. For guidance, visit AZIP’s website.

How often should I refill my water softener with salt?

Check your brine tank monthly and refill it as needed. The frequency depends on your water usage. Learn more from AZIP’s maintenance tips.

Can I use any type of salt in my water softener?

Not all salts are equal. Use high-quality pellets or solar salt for best results. Unsure what’s right? Contact AZIP for recommendations on the correct salt to use. 

Can You Partially Repipe A House

Is It Possible to Partially Repipe a House?

If you’ve been struggling with plumbing issues in your home, such as leaks or low water pressure, or even noticing discolored water (blue, green, yellow, or rust-colored), you may have considered repiping. However, replacing the entire plumbing system can be a large and expensive project, requiring significant time and effort. This leads many homeowners to wonder: Can you partially repipe a house instead?


The answer is yes, but partial repiping is only possible in some cases. There’s more to it than simply replacing a few pipes. In this article, we’ll explore what partial repiping involves, when it might be necessary, and when a full repipe might be the more appropriate option. We’ll also help you determine which choice is best suited to your circumstances.

What is Partial Repiping?

Partial repiping is the process of replacing or repairing only the specific sections of your plumbing system that are damaged, rather than replacing the entire system. This is especially useful in older homes where certain pipes may be suffering from issues like leaks, corrosion, or blockages. By addressing only the problematic areas, partial repiping can save you both time and money.


For example, if a pipe under the kitchen sink is leaking or rusted, there’s no need to replace your entire plumbing system. Instead, a plumber can replace just that section, making partial repiping a cheaper and faster alternative to a full repipe.


However, partial repiping isn’t a one-size-fits-all solution. Plumbing problems aren’t always visible, and you may not be aware of how many areas are affected until a plumber begins working. For this reason, it’s important to consult with a professional plumber to determine whether partial repiping is the right choice for your home.

When is Partial Repiping a Good Option?

Now that we’ve defined partial repiping, let’s take a closer look at the situations where it could be a smart choice:

1. Localized Problems

If your plumbing issues are limited to specific areas, such as a single leaking pipe, partial repiping may be all that’s needed. This is especially common in older homes with plumbing systems made of materials like galvanized steel or copper, which tend to corrode over time.


Plumbers can identify the problem areas and replace just those sections, rather than performing a full-scale repipe of your entire system. This approach is less invasive and can save you a significant amount of money.

2. Cost Savings

A full repiping job can be costly. Replacing all the pipes in your home involves tearing up walls and floors, which leads to higher labor costs and disruptions to your daily routine. Partial repiping, however, targets only the areas that require attention, offering a much more affordable solution.


If your budget is a concern but you need to address specific plumbing issues, partial repiping is a practical alternative that won’t break the bank.

3. Older Homes

In older homes, plumbing issues are often more localized. For example, pipes may only be deteriorating in certain areas due to age or wear and tear. If you’re dealing with plumbing problems in just one section of your home, partial repiping can address the issue without the need for a complete system overhaul.

4. When Pipe Materials Are the Issue

Some materials used in older pipes, like galvanized steel, are particularly prone to corrosion over time. If you’re only experiencing problems in specific areas, replacing just those sections can help improve water flow and quality. For example, newer materials like copper and PEX (cross-linked polyethylene) are more resistant to corrosion and are commonly used in partial repiping projects.

How Partial Repiping Works

Now that you understand when partial repiping may be useful, let’s take a closer look at how the process works. While the exact process may vary depending on the specific plumbing needs of your home, the overall steps will generally follow the same structure.

1. Inspection and Assessment

Before the plumber starts the job, an inspection is conducted to identify the areas that require attention. The plumber will use specialized equipment, such as cameras or leak detection tools, to pinpoint the affected sections of your plumbing system. This step is crucial because it helps determine exactly which parts need to be replaced.


During this inspection, the plumber may uncover additional issues that weren’t immediately visible. This is why it’s important to have a professional handle the process—what seems like a small problem could actually be part of a larger, hidden issue. A quick fix won’t always solve the underlying problem, so thorough inspection is essential.

2. Shutting Off the Water Supply

Once the areas that need to be repaired have been identified, the next step is to turn off the water supply to the house. This prevents water from damaging the property while the old pipes are being replaced with new ones.

3. Replacing the Old Pipes

After the water supply is shut off, the plumber will begin removing the old, rusted, or worn-out pipes. In some cases, this may involve cutting through walls or floors to access the pipes. Depending on where the pipes are located, this can be a relatively simple task or a more complex one. The plumber will assess the situation and take the necessary steps to remove and replace the old pipes.

4. Installing New Pipes

Once the old pipes are removed, the plumber will install new pipes in the affected areas. Materials such as PEX (cross-linked polyethylene) or CPVC (chlorinated polyvinyl chloride) are commonly used for partial repiping because they are durable, flexible, and resistant to corrosion. These materials are widely available and provide a more reliable solution compared to older piping systems.

5. Testing the System

After the new pipes are installed, the plumber will test the system to ensure there are no leaks and that the water pressure is restored to normal. This is a crucial step to confirm that the job has been completed correctly. It’s a quality control measure to ensure the plumbing system is functioning as it should.

6. Cleaning and Final Touches

Once the system has been tested and everything is in working order, the plumber will clean up the work area. In some cases, there may be minor cracks or damage to the walls or floors where the pipes were accessed. The plumber will address these issues and ensure the area is left tidy and well-maintained.


Final Thoughts


Partial repiping can be a great solution for homeowners who are dealing with specific plumbing issues in certain areas of their home. It’s a cost-effective and efficient way to repair localized problems without the need for a full system overhaul. However, it’s important to have a professional plumber assess your situation to determine if partial repiping is the best option for you.


If you’re unsure whether partial repiping or a full repipe is the way to go, consulting with an expert plumber is always a smart first step. They can help you weigh the pros and cons based on your home’s plumbing system and your budget, ensuring you make the right decision for the long-term health of your plumbing system.

How Do I Know If I Have a Bad Fill Valve?

How Do I Know If I Have a Bad Fill Valve?

Have you ever had your toilet running non-stop, making that faint trickling noise that drives you nuts? Or worse, have you been battling with a toilet that doesn’t fill up properly, making it seem like you might be stuck in a plumbing nightmare? The odds are that the culprit behind these issues is your fill valve. This little part controls the water flow into the toilet tank; when it goes bad, it can create many problems. So, how can you tell if it’s time to deal with a bad fill valve? Let’s break it down.

What Is a Fill Valve, Anyway?

In case you’re wondering, the fill valve is a critical component inside your toilet tank. After you flush, it’s the part that opens to allow water back into the tank. Once the water hits the right level, the valve shuts off, completing the cycle. Without this part doing its job, you’d be looking at a toilet that doesn’t flush right—or doesn’t stop flushing at all.

Common Signs of a Bad Fill Valve

1. Constantly Running Water

It’s probably the most noticeable sign: you flush, and the water keeps running. Even after the tank is full, water continues to pour in, creating that annoying sound that makes you wonder if you’re hearing a waterfall in your bathroom. What’s going on? Well, your fill valve might be stuck open or failing to close completely. It’s a common issue and, let’s be honest, it’s a water waster. If you’re hearing the sound of water running in your toilet, check the fill valve.

2. Slow or Inadequate Tank Filling

On the flip side, sometimes the water just isn’t filling up fast enough—or at all. After you flush, you might notice the tank isn’t refilling properly, or maybe it just takes forever. This could be a sign of a clogged or broken fill valve. Picture this: you’re waiting for the tank to fill, but it seems like the process is crawling. Frustrating, right? A faulty fill valve could be the reason your toilet’s “recovery” time is taking forever.

3. Water Overflowing into the Toilet Bowl

Let’s be clear: no one wants to see water flooding the bowl after a flush. If your fill valve doesn’t shut off at the right time, it could cause water to overflow into the toilet bowl. The problem here? You could be dealing with a fill valve that’s letting too much water flow into the tank—and spill over into the bowl. Imagine this happening right as you’re getting ready to leave the house. That’s a disaster waiting to happen.

4. Strange Noises (Hissing or Whistling)

Ever hear a weird hissing or whistling sound from your toilet? If so, you’re not alone. A lot of homeowners experience these noises when their fill valve is starting to give up. It’s the sound of water sneaking through an opening it shouldn’t be able to, which means your fill valve isn’t functioning properly. It’s like a leaky faucet, but with an added high-pitched soundtrack. Annoying? Absolutely. A sign of a bad valve? Definitely.

5. Leaking Around the Fill Valve

If you’ve noticed water pooling around the base of the fill valve, that’s a red flag. A worn-out seal or faulty valve can cause leaks. And while a small puddle might not seem like a big deal, it can lead to bigger problems down the line. Letting water drip into your toilet tank could damage surrounding parts, creating a larger mess than you bargained for. So, if you spot any leaks, don’t ignore them. Fixing the valve might be easier than you think.

Why Does a Fill Valve Go Bad?

Now that we know the signs, let’s talk about why these issues happen in the first place.

1. Wear and Tear

Like anything in life, fill valves don’t last forever. Over time, the rubber seals inside the valve wear down. A bit like your favorite pair of sneakers that eventually lose their bounce. This wear-and-tear can lead to leaks, slow filling, and the notorious running water.

2. Mineral Buildup

If you live in an area with hard water, the minerals in your water can build up inside the valve. These deposits create blockages and slow the flow of water, eventually leading to a fill valve that doesn’t work properly. Hard water isn’t just bad for your hair and skin; it can also wreak havoc on your plumbing. So, if you’re seeing signs of mineral buildup, it might be time to clean or replace your fill valve.

3. Debris or Dirt in the Water Supply

Sometimes, debris from the water supply can make its way into the fill valve. It could be dirt, rust, or something else that doesn’t belong. When this happens, the valve may get clogged or the internal parts may get stuck. This can cause the valve to malfunction, either failing to fill the tank or continuing to let water flow.

4. Improper Installation

You’d think that installing a fill valve would be a piece of cake, but sometimes it’s not done correctly. If the valve isn’t installed properly, it could lead to many problems. Leaks, water running continuously, and a failing valve are all possible consequences of a bad installation job.

How to Fix a Bad Fill Valve

Now, here’s where things get interesting. If your fill valve is causing trouble, you have a few options. Let’s talk about the fixes.

1. Clean the Fill Valve

If mineral buildup or dirt is the issue, try cleaning the valve first. Turn off the water supply to the toilet and flush to drain the tank. Remove the fill valve from the tank, then soak it in vinegar or another cleaning solution to break up the deposits. Once it’s clean, reassemble and check if the water fills up correctly. It’s like giving the valve a much-needed spa treatment.

2. Adjust the Fill Valve

Sometimes, the problem isn’t the valve itself—it’s just out of adjustment. If your toilet’s water level is too low or high, you can adjust the fill valve to make sure it’s just right. There’s usually a screw or adjustment knob that allows you to control the water level. Just be sure to follow the manufacturer’s instructions. A little tweak can go a long way.

3. Replace the Fill Valve

If cleaning or adjusting doesn’t work, you might need to replace the fill valve altogether. The good news is that replacing a fill valve isn’t a major project. It’s something most homeowners can do on their own with just a few basic tools. You can pick up a new fill valve at your local hardware store, and there are plenty of online tutorials to guide you through the process. But if you’re unsure, don’t hesitate to call a plumber.


Final Thoughts


A bad fill valve can definitely make your toilet a pain to deal with. But if you know what to look for—running water, strange noises, or leaks—it’s not that hard to figure out the problem. A bit of cleaning, adjusting, or replacing the valve can get your toilet back to working order in no time. And if you’re still unsure, there’s no harm in calling in a local professional. After all, plumbing isn’t something you want to ignore for too long. A little attention now can save you from bigger issues down the line.

FAQ

What is a fill valve, and what does it do?

The fill valve controls the water flow into your toilet tank after it has been flushed. It refills the tank to the appropriate level. If it’s working properly, it ensures that your toilet has enough water to flush effectively.

What are the signs of a bad fill valve?

Common signs of a bad fill valve include a toilet that continuously runs, a tank that takes too long to refill, or water spilling over the top of the tank. You may also hear strange noises like hissing or gurgling when the toilet is refilling.

Can I fix a bad fill valve myself?

Yes, in many cases, you can replace a bad fill valve yourself with basic plumbing tools. It typically involves shutting off the water supply, draining the tank, removing the old valve, and installing a new one. However, if you’re unsure or uncomfortable with the repair, it’s best to consult a professional plumber.

What Is the Average Cost of Sewer Line Repair in Chandler, AZ

What Is the Average Cost of Sewer Line Repair in Chandler, AZ?

The average cost of sewer line repair in Chandler, AZ, typically ranges from $1,500 to $3,500, depending on factors such as the extent of the damage and the method of repair. Homeowners may face higher costs if additional issues, like excavation or replacement, are required.

Ignoring early warning signs, like slow drains or foul odors, can quickly turn a manageable issue into a full-blown emergency that demands immediate, expensive fixes. To make the best decision for your home, it’s essential to understand the variables involved in sewer line repairs and how to recognize the signs of trouble early.

Today, we’ll answer the common question of  what is the average cost of sewer line repair in Chandler, AZ and the factors affecting price.

Pinpointing Common Sewer Line Issues

Recognizing the early indicators of sewer line issues is key to avoiding repairs and extensive property damage. Here are some signs that suggest sewer line issues.

Recurring or Persistent Clogs

Frequent clogs in household drains, such as sinks, showers, or toilets, often indicate deeper problems within the sewer line rather than isolated plumbing issues. Tree roots, for example, can penetrate sewer lines in search of water, creating blockages that simple plunging or drain cleaners cannot resolve. Another scenario involves repeated backups in multiple fixtures, signaling a blockage or collapse further down the line, which requires a thorough inspection and likely repair.

Unpleasant Odors Indoors or Outdoors

A properly functioning sewer system should not emit any odors. Foul smells coming from drains or around the property can indicate a crack or breach in the sewer line, allowing sewage to leak. For instance, persistent smells in a basement or near landscaped areas often lead back to small fractures in the sewer line, which can expand and lead to more severe damage if not promptly addressed.

Slow Drains Throughout the Home

While a single slow drain might be a minor plumbing issue, multiple slow drains generally indicate a significant sewer line problem. If standard plunging, snaking, or drain cleaners do not resolve the slow drainage, it likely points to a blockage or damage in the main sewer line. Examples include homes with simultaneous slow drainage in kitchen and bathroom sinks, often due to partially collapsed sewer pipes or severe blockages from sediment buildup, necessitating extensive cleaning or replacement.

Unusual Lawn Growth or Water Pooling

Unusually lush patches of grass or standing water that doesn’t drain properly can signal a leaking sewer line. Sewage leaks act as fertilizers, causing uneven vegetation growth or creating soggy areas in the yard. Instances of vibrant green patches on a dry lawn or persistent wet spots, even in arid conditions, often indicate a breach in the sewer line.

Factors Affecting the Cost of Sewer Line Repairs in Chandler, AZ

Several factors can influence the cost of sewer line repairs, making it essential for homeowners to understand the key elements that drive these expenses.

Type and Extent of Damage: In-Depth Analysis

The type and extent of sewer line damage are crucial factors influencing repair costs, and understanding the root causes of these issues can help homeowners take preventive measures.

Tree Root Intrusion

This usually occurs in arid regions or during drought conditions. Roots can enter sewer lines through tiny cracks or joints in the pipes, expanding as they grow, which exacerbates blockages and structural damage. For example, a mature tree with an extensive root system can penetrate old clay pipes, causing significant blockages and even breaking the pipes apart over time. 

This intrusion often requires specialized equipment to cut and remove the roots, and in severe cases, complete replacement of the damaged pipe sections is necessary to prevent future issues.

Pipe Corrosion

Pipe corrosion is particularly common in older sewer lines made from materials such as cast iron or clay. These materials are susceptible to chemical reactions over time, especially when exposed to soil conditions, water acidity, or industrial waste. 

For instance, clay pipes, while not prone to rust, can become brittle and crack under pressure or due to the natural settling of the ground. Severe corrosion compromises the structural integrity of the pipes, often necessitating full replacements to restore proper function.

Blockages

Over time, debris, grease, or non-biodegradable materials build up inside the pipes, restricting water flow and leading to backups. For example, in residential areas, common culprits include fat, oil, and grease (FOG) from kitchen sinks, which can solidify and stick to pipe walls, gradually causing significant obstructions. In multifamily dwellings, the problem can be exacerbated by improper disposal of items like wipes, paper towels, or sanitary products. 

Blockages can also result from sediment buildup or mineral deposits in areas with hard water, leading to the gradual narrowing of the pipe interior. Severe or recurrent blockages often point to underlying issues such as collapsed pipes or invasive root growth, requiring more comprehensive repairs like pipe bursting or full excavation and replacement.

Repair Methods: Traditional Excavation vs. Trenchless Techniques

The decision between traditional excavation and trenchless repair methods significantly impacts costs. Traditional excavation is preferred for severe sewer line damage, such as extensive corrosion, major root intrusion, or total pipe collapse. This method allows for complete pipe replacement but involves significant digging, leading to higher costs due to the need for restoring landscapes, driveways, or other disturbed areas.

Trenchless repairs, like pipe lining (Cured-In-Place Pipe) and pipe bursting, are less invasive alternatives ideal for pipes with minor cracks, leaks, or moderate root intrusion. While trenchless repairs can have higher upfront costs per foot due to specialized materials and equipment, they often result in lower total expenses thanks to faster completion times and minimal property damage, making them suitable for most repairs where full excavation isn’t necessary.

Property-Specific Conditions

Several unique property-specific conditions can influence the cost and complexity of sewer line repairs. For instance, properties with high groundwater levels may require continuous dewatering during repairs, adding to labor and equipment costs. Additionally, homes with foundation issues, such as settling or cracks, can complicate access to sewer lines and necessitate structural support to prevent further damage. 

Another condition is properties with historic designations or unique architectural features, which may require special permits and careful handling to preserve the site’s integrity, leading to longer project timelines and increased costs. 

Age and Material of Existing Sewer Line

The age and material of existing sewer lines significantly impact their durability and the extent of repairs needed. Older sewer lines, often constructed from outdated materials such as clay, cast iron, or Orangeburg, are particularly susceptible to deterioration. These materials are prone to issues like cracking, corrosion, and collapses due to their inability to withstand modern stressors, such as ground movement or increased water pressure. 

Clay pipes are brittle and can crack easily; cast iron is susceptible to rust and corrosion over time, and Orangeburg degrades quickly under pressure. As a result, these aging lines often necessitate complete replacements rather than simple repairs, driving up both the complexity and cost of sewer line maintenance and restoration.

Extent of Restoration Post-Repair

The extent of restoration required after sewer line repair can significantly increase overall costs. This includes re-landscaping, replanting grass or shrubs, repairing driveways, sidewalks, or patios, and fixing any damaged irrigation systems. 

If excavation was necessary, returning the property to its original condition often involves more than just filling in the trench. Replacing hardscapes, restoring lawn areas, or addressing structural damage to nearby features can add considerable expense, making the total cost of sewer line repair more substantial than anticipated.

Emergency vs. Scheduled Repairs

The timing of sewer line repairs plays a crucial role in determining costs, with emergency repairs generally being more expensive than scheduled ones. Emergency repairs often require immediate attention, involving rapid response teams, after-hours labor, and expedited services, all of which can significantly drive up costs. 

These repairs are usually necessary when a sudden failure or severe blockage occurs, posing immediate risks to property or health. In contrast, scheduled repairs allow for more flexibility, enabling property owners to plan and budget accordingly. By opting for scheduled repairs, homeowners can often avoid premium charges associated with urgent, last-minute interventions. 

Moreover, scheduled repairs allow for thorough pre-assessment and planning, which can lead to more efficient repair processes and potential cost savings in labor and materials.

Preventing Sewer Line Damage: Proactive Steps for Chandler, AZ Homeowners

Prevention is cheaper than dealing with repairs after problems have occurred. Here are some proactive measures homeowners in Chandler can take to protect their sewer lines:

Regular Inspections and Maintenance

Scheduling regular sewer line inspections can help catch potential problems early. Many plumbing companies offer camera inspections that allow early detection of issues like root intrusion, corrosion, or blockages. Annual inspections are recommended, especially for homes with mature landscaping.

Even with the best preventative measures, sewer line issues can still occur. Set aside a maintenance fund to cover unexpected plumbing expenses, so you’re not caught off guard by sudden repair costs.

Smart Landscaping Decisions

To minimize this risk of tree root intrusion, avoid planting trees and large shrubs near your sewer lines. If trees are already in place, try installing root barriers to stop roots from reaching the pipes. Additionally, opt for smaller, less invasive plant species in areas near your sewer lines.

Proper Waste Disposal Practices

What goes down your drains affects your sewer line’s health. Avoid items such as wipes, sanitary products, and cooking grease. All of these can build up in your sewer line, leading to damage over time. Educating household members about proper waste disposal can help reduce the risk of sewer line problems.

Keep Your Sewer Line in Top Shape with Expert Care

Sewer line maintenance and repair are critical components of homeownership in Chandler, AZ. By understanding the common issues, recognizing the warning signs, and choosing the right repair methods and service providers, you can protect your home from extensive damage and maintain a healthy, efficient plumbing system.

Trust the experts at AZIP for reliable and efficient sewer line repair services in Chandler. Our team is committed to providing high-quality repairs that minimize disruption to your home and help you maintain peace of mind.

Contact us today to schedule an inspection or consultation, and let us help you safeguard your home with expert sewer line care.

FAQs

What are the environmental impacts of sewer line damage?

Raw sewage leaks can harm local ecosystems, affecting plant and animal life. Addressing sewer line issues promptly can mitigate these impacts and protect the environment from further degradation.

How does the location of a property affect sewer line repair costs?


The location of a property, including its proximity to other utilities, soil type, and terrain, can significantly impact repair costs. Properties in rocky areas or with high groundwater levels may require more complex repairs, while urban settings may involve additional coordination with local authorities, increasing overall expenses.

What role does insurance play in covering sewer line repair costs?

Insurance coverage for sewer line repairs varies widely by policy. Some homeowners’ insurance policies may cover repairs if the damage is sudden and accidental, while others may exclude coverage for gradual deterioration. Understanding your policy’s specifics is crucial to determine what repair costs might be covered.

What Is the Average Cost of Tankless Water Heater Installation in Chandler, AZ

What Is the Average Cost of Tankless Water Heater Installation in Chandler, AZ?

The average cost of tankless water heater installation in Chandler, AZ, typically ranges from $1,500 to $3,000, depending on factors such as the unit’s size, brand, and the complexity of the installation. Additional costs may include permits, modifications to plumbing or electrical systems, and labor fees.

Every household needs readily available hot water. Tankless heaters can provide hot water at any time of day. No more waiting for the water to heat up or wondering when it will run out. They are also significantly more energy efficient than water heaters with storage tanks.

If you want to save money while enjoying long, hot showers daily, consider installing one in your house. But before you do, let’s look at how much you’ll have to budget for this service and whether there are any other expenses you should anticipate.

Benefits of Tankless Water Heaters

Switching to a tankless water heater is a practical and money-saving choice for many households. These units are 24% to 34% more energy efficient than other water heaters. This efficiency stems from their ability to heat water on demand, meaning they only use energy when hot water is needed. 

Tankless models have a compact design, saving valuable space in your home. Unlike bulky tank units, you can place them on the wall to fit into smaller areas or outdoor installations. Another key feature is the constant hot water. You can now have your daily shower and run multiple appliances without running out of hot water.

Tankless water heaters can work well over 20 years if you do regular maintenance. The maintenance needs are also lower, as these systems have fewer parts that can wear out.

What Determines Tankless Water Heater Installation Costs

Before the installation company can give you a definite quote, they’ll need some information. They’ll want to know what type of water heater you want, the existing plumbing in your home, where you want it to be, and any additional features you may desire. This initial assessment allows them to provide a more accurate estimate.

Type of Tankless Water Heater

The most expensive part of the installation is the type of heater you want. You can go electric, or if your house has a gas line, you can have a gas tankless water heater. Electric models are usually more compact and easier to maintain, while gas models may offer better performance for larger families. You have two main options:

  • Electric tankless water heaters generally have lower upfront costs, averaging between $1,000 and $1,500 for the unit and installation. They are easy to install but might not deliver hot water at the same flow rate as gas models, which can be a limitation for larger households.
  • Gas tankless water heaters typically cost $1,500 to $2,500, including installation. These units have a higher flow rate, but installation can be more complex, especially if your home lacks a gas line or if it doesn’t have adequate vents.

Installation Complexity

If your plumbing or electrical setup does not meet the requirements of the new heater, it will need upgrades or modifications. For example, if your home has outdated pipes that restrict water flow or electrical systems that cannot accommodate the new unit, those changes can increase costs.

The price will also depend on how easy or difficult the installation location is to access. Expect additional labor costs if it’s hard to reach or you need significant remodeling to fit the new unit. The complexity of the installation work directly correlates with the price you will pay.

Labor Costs

In Chandler, AZ, average hourly rates for plumbers range from $70 to $150, depending on their experience and qualifications. To ensure you’re getting a fair price, try to get estimates and quotes from different licensed professionals.

Hiring licensed and experienced plumbers is essential for a successful installation. They have the skills to do the job correctly and thoroughly understand local codes and regulations. When assessing labor costs, consider any warranty or service guarantees the contractor offers. A slightly higher upfront cost for a qualified professional can be a worthwhile investment if it means avoiding issues in the future.

Maintenance and Long-Term Costs

To keep your tankless water heater efficient and in good condition, you must also invest a little in maintenance. Try to flush it at least once a year to remove sediment buildup and improve its performance. Cleaning the filters and checking for mineral deposits or corrosion are key tasks. Maintenance will probably cost you around $100 to $300 a year.

Tankless water heaters are more durable than traditional water heating systems. They last longer and have an average lifespan of about 20 years. However, water quality and usage habits can impact its longevity. The replacement or repair costs will range from $1,000 to $3,000.

Installation Costs Breakdown

Electric tankless heaters generally cost less upfront, while gas units often provide higher flow rates, which can benefit larger households. Factor in installation labor costs because hiring a professional can range from $500 to $1,500, depending on local labor rates.

Labor expenses could increase if you modify your home’s plumbing to accommodate the new system. Don’t overlook permits and inspection fees. Many areas require permits for water heater installations to comply with local codes. These fees vary, but budgeting around $100 to $300 is wise.

Financing and Incentives for Installation

Many companies offer flexible payment plans, so you don’t have to pay for everything all at once. Typically, these plans can range from 12 to 60 months, depending on the total installation cost and your credit score. Monthly payments can vary widely – if your installation costs $3,000, you might pay around $50 to $250 monthly.

Some energy companies provide financing as part of their energy-saving initiatives, often featuring lower interest rates. Look into government programs that encourage people to get energy efficiency upgrades by offering them low-interest loans. Reviewing multiple offers can help you find the financing that fits your budget without compromising your financial stability.

Rebates and Incentives

You can use various local and federal incentives designed to promote energy-efficient appliances. You can get significant rebates up to a few thousand dollars, based on the appliance type and energy savings achieved. Check your state’s energy office website or local utility company for specific rebate programs available in your area.

To apply for these rebates, gather necessary documentation such as purchase receipts and energy efficiency certifications. Submit your application promptly, as some incentives may have deadlines. You can even find seasonal promotions for additional savings on top of existing rebates.

Choosing the Right Installer

Look for licensed professionals with experience installing tankless systems. See what people online have to say, or ask your friends or family to recommend a company they are satisfied with. Try to ask the potential installers some questions regarding the following:

  • Their experience with tankless models.
  • Their preferred brands.
  • Their warranty policies.

Getting multiple quotes helps you compare services and prices. When reviewing these estimates, consider the scope of work, labor costs, and warranty details. See which ones have the most transparent pricing without hidden fees.

Find Installation Services in Chandler, AZ

Get ready to enjoy an endless supply of hot water during your shower, when you do laundry, wash the dishes, or do all those things simultaneously. Lower your energy consumption and add convenience to your day-to-day life with the expert installation services that Arizona Integrity Plumbing offers.

Our technicians will work on removing your old heater and installing your new system. Thanks to our expertise and efficiency, you’ll enjoy a long hot bath or steamy shower in no time. We also offer repair and maintenance so your water heater is always in top shape.

Get ready for an endless hot water supply, and call us today!

FAQ

What is the cost of a 10-11 GPM gas tankless water heater?

A 10-11 GPM gas tankless water heater typically costs $2,500 to $3,000. This estimate includes the unit cost and the installation components. Installation fees usually add another $500 to $1,000. Local labor costs and specific brand choices can influence these figures, so it’s wise to get multiple quotes before proceeding.

What is the cost of a 6-7 GPM electric tankless water heater?

Expect to spend between $1,000 and $1,200 on a 6-7 GPM electric tankless water heater. Installation costs generally add another $400 to $800, pushing the total to approximately $1,400 to $2,000. Electric units can require special electrical upgrades, which may increase the overall price.

How do I know if my plumbing is suited for this type of heater?

Check your home’s plumbing system for compatibility with a tankless water heater. Look for adequate gas supply lines or electrical capacity for the unit. Additionally, ensure your main water line can deliver the necessary flow rate. A licensed plumber can evaluate your system and recommend any upgrades to accommodate the new heater before installation.

Can I do the installation myself?

While DIY installation of a tankless water heater is possible, it’s not recommended unless you have plumbing and electrical experience. Poor installation can lead to inefficiencies or even safety hazards. A licensed professional will work following the local codes and set up the water heater for optimal performance. Weigh the potential risks and costs before deciding to go the DIY route.

Is it a good investment to buy a tankless water heater?

Tankless water heaters are worth your money because they offer on-demand hot water, saving energy and reducing utility bills compared to traditional models. While the initial costs are higher, the long-term savings and convenience often justify the expense. Consider your household’s hot water needs and usage patterns to determine if this system aligns with your lifestyle and budget.

What is the Average Cost of a Water Heater Replacement in Chandler, AZ?

What is the Average Cost of a Water Heater Replacement in Chandler, AZ?

The average cost of a water heater replacement in Chandler, AZ is between $1,800 and $2,500, depending on the type and size of the unit. For a precise quote, contacting local plumbing professionals is recommended.

We use hot water constantly, which means the water heater never stops running. But what if your water heater is acting up, or it’s not big enough to provide enough water for your household? You might need to replace it with a better model. But what is the average cost of a water heater replacement in Chandler, AZ?

In today’s guide, we will discuss the average expenses of replacing a water heater and break down the costs based on different water heaters. We will include traditional tank systems, modern tankless options, and any additional services that may come into play. Knowing these figures helps you budget effectively and get a unit that’s right for your household without overspending.

What Do Replacement Costs Depend On

Several factors directly influence the final price you have to pay to replace a water heater. First, the type of water heater you choose plays a significant role. Electric water heaters typically cost less than gas models upfront, while solar options can require a higher initial investment but may save you money on energy bills over time.

Next, the size and capacity you need for your household will affect pricing. Larger tanks or higher capacity units can drive up costs, so assess your household’s hot water needs before selecting a model.

If your existing setup requires upgrades or modifications to accommodate a new water heater, expect extra charges for the labor and materials needed. Finally, labor costs can vary based on local market rates.

Cost of Replacement Water Heaters

When considering a new water heater, your primary expense will be the cost of the unit itself. To determine the right model, you must clearly understand your hot water usage, budget, and the energy source available in your home. Additionally, you should factor in installation costs, which can also fluctuate based on the type of heater you choose, the complexity of the installation, and your geographical location.

Electric Tank Water Heaters

These heaters store hot water in a large tank and rely on electric heating elements to warm the water. The units typically have a wide capacity range, from 20 to 80 gallons, making them suitable for small and large households. Installation costs for electric tank heaters usually start at $900 for the smaller sizes and go up to $2,700 for bigger ones.

  • Pros: Electric tank heaters are more affordable replacements and cheaper to install than other models. They also require minimal maintenance.
  • Cons: They tend to have higher operating costs due to electricity prices, and if the power goes out, so does your hot water supply.

Tankless Water Heaters

When you run the water on a tankless water heater, it moves through a pipe heated by gas or electricity. This allows you to have hot water anytime, which is perfect for larger families. On average, replacing your old heater with a tankless one will cost between $1,000 and $3,000, which includes the unit and labor.

  • Pros: They save space since they don’t require a bulky tank and have a longer lifespan than traditional heaters. They also offer up to 34% energy savings by only heating water as needed.
  • Cons: The upfront costs can be significantly higher, and if you use multiple faucets simultaneously, you may experience a decrease in water temperature.

Solar Water Heaters

Solar panels can be connected to water heaters and use energy from the sun to heat water. This method can be particularly cost-effective in sunny regions, where it can drastically reduce energy bills. The pricing for solar water heaters varies widely, typically between $3,000 and $7,000 for installation, including the solar panels and any necessary modifications to your plumbing.

  • Pros: They significantly reduce energy costs and have low operating costs once installed. They are also environmentally friendly.
  • Cons: The initial investment can be high, and they are most effective on days with plenty of sunlight. You might need a backup system in a less sunny area.

Gas Water Heaters

These heaters heat the water by burning natural gas or propane. They come in both tank and tankless varieties. Tank gas water heaters are similar to electric models but usually heat water faster and can have lower operating costs if natural gas prices are reasonable. Installation costs for these units generally range from $1,000 to $3,000.

  • Pros: Gas heaters tend to heat water more quickly than electric models and often have lower utility bills if natural gas prices are lower than electricity prices.
  • Cons: They require ventilation, which can complicate installation, and they can be less efficient if not properly maintained. Also, a gas outage might affect whether you have hot water.

Additional Expenses to Consider

While the replacement heater will be the most significant expense, a few related costs might pop up during the service. Beyond the price of the new heater, you may also encounter fees for permits and potential plumbing upgrades. These costs can add several hundred dollars to your expenses, so budget for them beforehand.

Extra Installation Costs

Your expenses may increase significantly if your plumbing or electrical systems need upgrades to accommodate the new unit. For instance, the upgrades can become costly if the water heater requires a larger gas line or a dedicated electrical circuit. Don’t forget about disposal fees for your old water heater. Most installation companies charge a fee to remove the old heater and take it to a disposal site, which is usually around $100.

Permits and Inspections

Chandler, AZ, has specific regulations regarding water heater installations. Before you proceed with the replacement, check if you need a permit for the replacement and installation. Typically, permits keep the work compliant with building codes and safety standards.

The costs of obtaining these permits can vary, but you should expect to pay an average of $50 to $150. Once the installation is complete, an inspection might be needed to verify that everything meets local standards.

Warranty and Maintenance Plans

Most manufacturers offer product warranties, ranging from a few years to a lifetime, depending on the model. Invest in a water heater with a solid warranty, as this can cover repairs or replacements should problems arise. Consider purchasing a maintenance plan. They typically cost between $100 and $300 annually and provide routine checks and services that can save you money on unexpected repairs.

Tips for Saving on Water Heater Replacement

Consider taking advantage of local and federal incentives when replacing your water heater. Many utility companies in Chandler offer rebates for upgrading to energy-efficient models. Check with your utility company to see what programs are currently available.

Additionally, federal tax credits may apply for certain energy-efficient appliances, allowing you to get a portion of your investment back come tax season. By opting for an energy-efficient model, you qualify for these incentives and can experience significant savings on your utility bills. 

Timing Your Purchase

Consider purchasing during off-peak seasons like late fall or early spring when there isn’t as much demand. Many retailers offer seasonal discounts and run special deals to attract more clients.

Consider purchasing during big events like Black Friday or holiday sales, where you might find substantial price reductions. You can secure a better deal if you make your purchase during this time. Don’t overlook the possibility of negotiating with local contractors, especially if you’re considering installation with your purchase.

Find The Best Company For Water Heater Replacement

Replacing a water heater with a newer, more energy-efficient model involves several expenses. Sure, there’s the heater’s price, but you must also make room in your budget for other expenses like permits, warranties, and labor. If you want to know what you’re paying for, come to Arizona Integrity Plumbing for an easy-to-understand quote.

Our experienced plumbers can replace your old water heater with any modern model you want. Our work is always of the highest quality, and we follow all industry and local standards to give you the best service. That is why we’ve been Arizona’s go-to plumbing company since 2006.

Experience the difference – call us now for your free quote!

FAQ

How much will replacing my old heater with a tankless one cost?

In Chandler, replacing your old heater with a tankless one typically costs between $3,000 and $4,500. This price covers the replacement heater, its installation, and the permits. Although tankless heaters have a higher upfront cost, they often lead to energy savings due to their efficiency. Consider both installation costs and potential long-term savings when making your decision.

How can I tell when to replace the water heater?

Signs that it’s time to replace your water heater include inconsistent hot water, unusual noises like banging or popping, leaking around the base, or rust-colored water. Regular maintenance can extend a water heater’s lifespan, but these signs indicate you need a new unit.

Can I replace a water heater myself?

Replacing a water heater yourself is possible but not advisable. It involves plumbing, electrical, and gas connections, which can pose safety risks if incorrectly handled. Local codes may require a licensed professional to install them. If you choose to DIY, follow all safety measures and local regulations.

How much can I save on energy bills with a new water heater?

Depending on the model and household usage, a new water heater can save you 10-50% on energy bills. High-efficiency options, such as tankless or heat pump water heaters, yield the most savings. Upgrading from an older, less efficient model can significantly lower monthly expenses. Check the Energy Star ratings to find the most efficient options available.